|
HeatersPlus.com Questions? 1-800-442-2581 |
Our secure online ordering website: www.MorElectricHeating.com.
|
| Home | Ordering | Contact Us | Heaters | Controls | Accessories | Search | ||
|
HeatersPlus.com Questions? 1-800-442-2581 |
Our secure online ordering website: www.MorElectricHeating.com.
|
| Home | Ordering | Contact Us | Heaters | Controls | Accessories | Search | ||
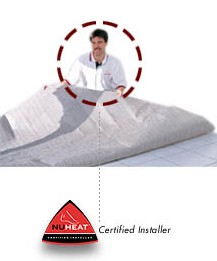
Installation Instructions for the NUHEAT Floor Warming System

We are an authorized distributor for
NUHEAT Industries Ltd. Tile
floor-warming system
Installing NUHEAT is easy. The
heating mats are installed directly between the tile/stone and subfloor and
require the same bonding materials that are being used to lay your tile or stone
floor – no extra supplies are needed!

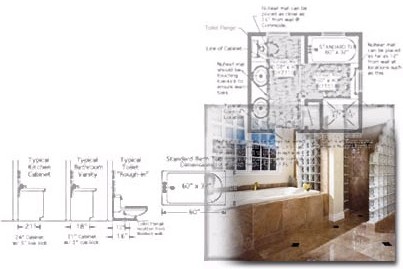
Flooring TipsThe following are some helpful tips for your installer when preparing and executing a NUHEAT installation. Note that this is not an installation guide, for a complete installation guide click here. Preparing for InstallationReceiving Accurate Mat Sizing – Always base your selection of heating mat sizes on the actual room dimensions measured at the job site. Architectural drawings do not reflect changes that take place at the project location. For custom sizing and mat shapes, give your accurately measured floor plan to us to send in to NUHEAT. |
|
||
Instruction on how to measure and draw an accurate floor
plan:
Using
the Right Tools
– A successful NUHEAT installation requires the following tools:
Testing
the mats
– Each NUHEAT mat must be tested using a multi-meter
before, during and after the installation to ensure no damage. The
warranty is subject to these tests being completed and recorded. Review
the installation guide for details on how to test the radiant electric
heating mats. Checking in with NUHEAT – Ensure that you understand all the installation details of the tile heating system before beginning your project – call 1-800-778-9276 to go over the details with a NUHEAT technical expert. The warranty is subject to all first-time installers calling NUHEAT prior to installation. Confirming that your Mats fit the Room – Before installing your NUHEAT mats, lay them out in the room first to ensure that they cover your floor properly. Installing NUHEAT SuccessfullyInstalling
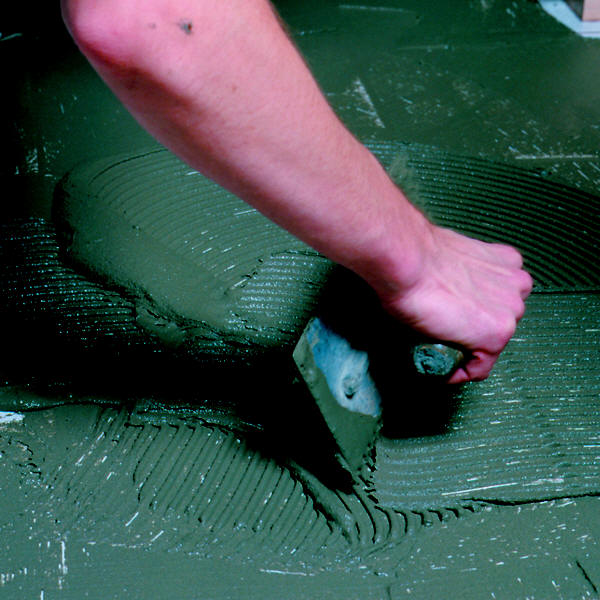
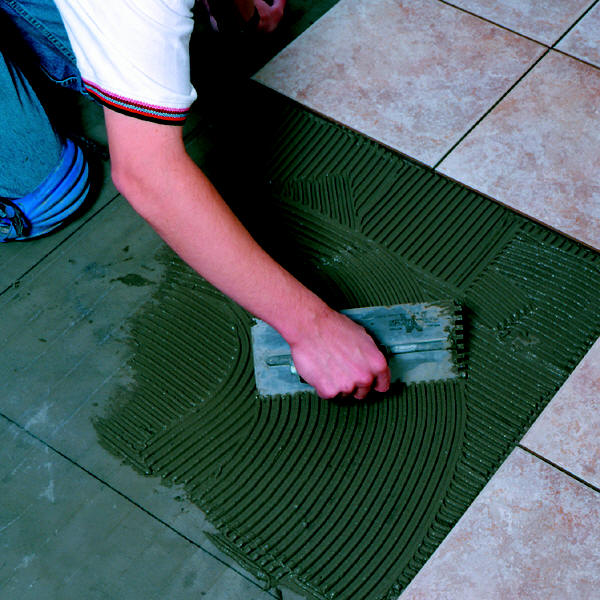
NUHEAT is easy – here are a few quick tips: Working
with Thinset Consistency
– Make your
thinset consistency thinner than normal for the layer between your mat and
subfloor to allow for easy bonding. Cleaning
Grout Lines
– Use a plastic bristled brush or sponge to clean away any
excess thinset that seeps through the space between the tiles while it is
wet. If you wait, the thinset will become hard and difficult to remove.
Cleaning grout lines with sharp objects such as utility knives or margin
trowels can result in damage to the NUHEAT mats which is not covered by
the warranty. Back
Buttering Tiles
– To ensure a successful bond between your tile and subfloor, back butter
your tiles with thinset before laying them in the thinset layer placed
over the NUHEAT mats.
Allowing Thinset to Cure
– Ensure that
the radiant heating system is not turned on until the thinset and grout
have cured according to the recommended time on the packaging. This will
ensure that the adhesive bond is not compromised. Replacing Tile – See the complete installation guide for instruction on removing and replacing tile over the NUHEAT system. Click here for a complete installation guide. (Note – a PDF will require 2-5 minutes to download) |
|||
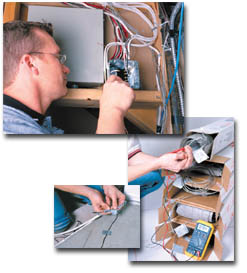
Electrical BasicsNUHEAT specifications:
►
Heating mats are 110V, 12 Watts/Square Foot (41 BTU)
►
NUHEAT must be on a Class A ground fault circuit interrupter (GFCI) ► A Programmable Floor-Sensing Thermostat is most commonly used - click here for details ► A certified electrician must make the final connection to power. |
|
| You must have the free Adobe Acrobat Reader plug-in. |
|
NuHeat is a registered trademark of NUHEAT Industries Ltd.
|
We are a Distributor of Industrial, Commercial and Residential Heaters and Controls. Always consult manufacturers installation instructions for proper installation of the products or systems shown on this website. © Copyright 1999-2019 Mor Electric Heating Assoc., Inc. MOR
ELECTRIC HEATING ASSOC., INC. |
| |